Tuesday, October 23, 2012

Rainy Day and Getting Cozy

The other day it was raining here in New York...again.  Not just raining but pouring outside.  It was a dark morning and even Stina questioned me when I woke her up asking if I was sure that it was daytime and time for school yet.  Murph called out sick so it seemed like the perfect day for pajamas, comfy sweats and soup.  After I dropped Stina off at school I took a quick swing by Stop and Shop and grabbed the Soup Veggie pack.  There was no farmer's market and there is something about the soup veggie pack in the produce department that reminds me of when I was little.  My Mom was always making soup for us and we loved it!  Soup is the ultimate comfort food.  Whether it's the warmth it offers or the memories of chilly days after playing in the snow, there is just something about chicken soup.

I always have poached chicken on hand.  Poached chicken is great to have in the fridge-I use it for soup, chicken salad, tacos, and so much more!  It is the easiest thing to do too which makes it even more appealing.  I usually poach 3-4 breasts (boneless and skinless) at a time.  In a medium pot, I boil water (enough to cover the chicken), 4 baby carrots, onion or shallot (halved), 1 celery stalk cut in half, parsley, dill and if I have it 2 or 3 slices of lemon.  Add some salt and pepper and when the water comes to a full boil, add the chicken.  Cook it for about 5 minutes, then cover and turn off the heat.  I leave it covered for another 20 minutes, turning over after 10 minutes.  That's it-take out the chicken and keep until you are ready for it.
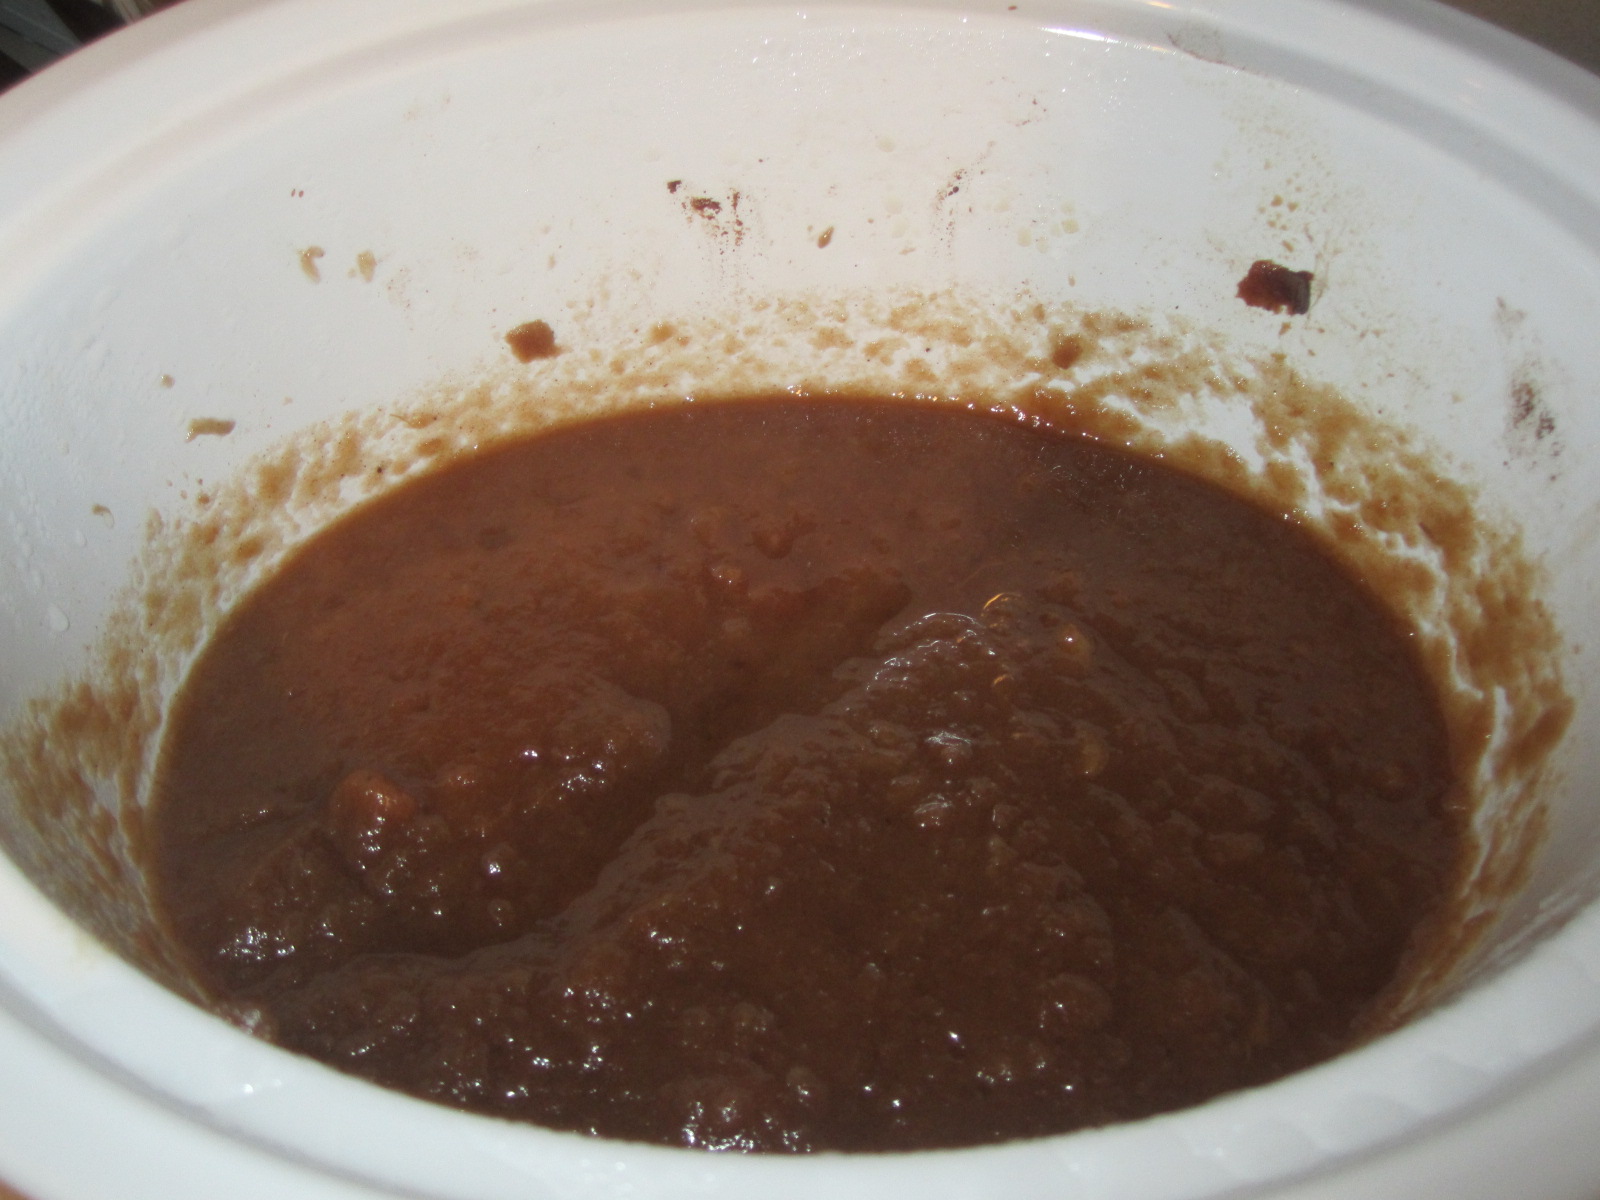
Chicken poaching-there's a few lemon slices hiding under the chicken.

Now onto the soup...Murph was listening to some Frank Sinatra and Louis Prima in the other room and that seems like perfect soup making music.  The chicken may seem like it should be the star, but there are no solos in my soup.  I want all the components to make an ample appearance.  I try to cut bigger slices of my veggies so they all have a chance to shine!  Use whatever veggies you've got on hand-that's what makes it so easy.

Lots of veggies for a healthy, hearty and yummy soup!
For this soup I used carrots, celery, leek, onion, turnip, a parsnip and of course dill and flat leaf parsley.  I always use flat leaf parsley-I have no use for the curly kind :-(  If I have the time or the chicken I will make stock, but this soup was all about fast comfort so I took the easy route and went for stock in a box.  I am in love with stock in a box-I have at least 4 in my cabinets at ALL times!!!  A little obsessive-yes but I am never out of it!  I also added in the all important noodles-I used fine egg noodles.  I boiled them in chicken stock before adding them so they didn't suck up all my stock in the soup.

This is the soup we had for lunch on that rainy day! 

I threw in an extra picture because I forgot to take one of the soup in the bowls-I was so hungry I forgot to use the camera that was next to me at the table!

Chicken Soup for a Rainy Day

2 poached chicken breasts cubed (recipe above)
2 carrots, sliced into coins
2 celery stalks, sliced
1 small turnip, peeled and diced
1/2 leek - sliced
1 small onion, diced
1 parsnip, sliced into coins or cubed
small bunch flat leaf parsley, chopped
small bunch fresh dill, chopped
1-2 boxes of chicken stock (depending on how much broth you want)
3 cups of fine egg noodles, cooked (or whatever noodle you like)

Heat the stock in a medium to large pot to a low simmer.  While your stock is heating, cut up your veggies and chicken.  Once you have a little bubble in your stock, add the veggies to the pot.  Add half of your chopped parsley and dill.  Save the other half of each for right before you serve.  Cook for 15-20 minutes.  Add the chicken and simmer for another 10 minutes.  Add the cooked noodles and the rest of the parsley and dill.  Simmer 5 more minutes.  Serve and enjoy!

The next blog will be about another of my favorite soups-Roasted Butternut Squash Soup.  Nothing like squash to make it feel like Autumn! 


Wednesday, October 17, 2012

Primping the Pumpkin

Pumpkins are everywhere right now.  The minis have already made two trips to pumpkin farms this month and we ended up with 9 pumpkins in the house this year.  We have one big guy still waiting to be carved-I am determined to carve it all fancy this time around.  I told Murph that I'll be using his Dremel to do it...we'll see.  The minis, Murph and I painted three medium pumpkins and we have one small one and 4 mini pumpkins.  The small pumpkin and the mini pumpkins were super primped this year.  I made the small one especially for my Stina.  She is a Georgia Bulldog girl and loves watching football on Saturdays while yelling in the living room..."Go doggies! Woof woof woof!"  On Sundays she calls my Big Daddy and serenades him with Go Bears! Grrr Grrr Grrr!  I just love this girl!!!!

As for the "fancy" pumpkins-they were super cheap and soo easy.  I have made the sparkle pumpkins before so I had all the glitter and glue.  These were actually free because my Mom had bought the four mini pumpkins for me-score me!  The UGA pumpkin cost 73 cents-I had Sharpie markers already and just printed up the logo. 

First up-Sparkle Pumpkins.  I use the mini pumpkins for this and they look beautiful on my wall unit, but I also have used them lined up on a rectangular platter with leaves as a centerpiece.

my mini pumpkins
Glitter-I LOVE SPARKLY THINGS!


I use the Martha Stewart glitter whenever I can.  It is really fine and has amazing sparkle.  The Martha glitter comes in tons of colors and all different textures.  Just wait until I blog about decorating pine cones for Christmas-you will see why my house and kids are usually covered in glitter by the end of December!  I will glitter just about anything that sits still long enough.  One of the kitties was sleeping under the table today when I was doing the pumpkins and by the time I was finished the end of his tail even ended up glittered. 


  I paint the pumpkins with the paste.  The Martha Stewart Glitter glue has a brush attached to the top, so it is very convenient.  Once the pumpkin is completely covered, I sprinkle the entire pumpkin with glitter.  I repeat this for each pumpkin and allow it to dry over night.  I like using a variety of Fall colors but you can use any colors you have on hand or what you like best.  What you are looking for is the sparkle!  The bonus is that all four pumpkins were completely glittered in less than 30 minutes.

Sparkle Sparkle!

Next up is the UGA pumpkin.  This one was a little more complicated but still on the easier side.  You will need a pumpkin (thanks captain obvious), logo you want to transfer, white chalk and permanent markers in the color of your team.  The Dawgs are black and red-colors I already have so again this was a cheap project. 


 I printed up the UGA logo and covered the back in white chalk. The chalk creates an outline transfer onto the pumpkin making it easy to get more precise lines. I could never have done it freehand-I know my limits!
 Tape your logo onto your pumpkin and pressing hard, but not hard enough to puncture the skin, trace the logo onto the pumpkin.  I used a fine point Sharpie for this part.
 

 You will be left with a chalk outline that you can then write over in your permanent marker and begin to color in.  I used permanent markers as opposed to paint because paint gets too messy and I wanted the lines to be precise.

Once the G was totally filled in I needed to make the red outer oval.  I used a second printed logo so the chalk dust wouldn't mess up the black G.  I cut out the thin outer oval and colored it in red.


And there you have it-two different types of fancy schmancy pumpkins for Halloween.  Stina was so happy when she came home from school to find her football pumpkin.  She knew as soon as she saw it and even barked her best Dawg bark!


Wednesday, October 10, 2012

Slow Down for the Season...

So as you know from my last post, I LOVE Fall!  Besides the cooler weather and the beautiful scenery the food is wonderful.  Fall is the time when I start to make heartier, homier meals.  It is the time for comfort foods to shine!  This is also the time I pull out my slow cooker from it Summer hibernation in the closet.  This Autumn, the slow cooker has been working overtime-from BBQ Chicken to Applesauce I have loved using it again. 

As far as slow cooking goes, I was always afraid to do it.  My Mom never used one when I was growing up and I was convinced it was because the house would go up in flames if left unattended.  This may have been a possibility with the crock pots of the late '70's but today's crock pots are super sleek and as far as I know super safe!  I have even left the house with the slow cooker on!!!  Me, nervous, anxiety prone me actually left the slow cooker on with NO ONE HOME!  Baby steps folks-I'm getting there.

So the first venture was applesauce.  My kids love applesauce and will eat it with anything.  When Matthew was a baby, I made all of his food and his favorite was homemade applesauce pureed with chicken.  Not much has changed except they'd much rather eat regular chicken separate from their apples.  This time around I made Brown Sugar Applesauce.  It is a dark, yummy applesauce filled with warm caramel sort of flavors.


BROWN SUGAR APPLESAUCE

8-10 apples, peeled, cored & sliced (I used a combination of Golden Delicious and Gala)
1/2 cup water
1/2 tsp cinnamon
1/4 tsp ground ginger
1/8 tsp ground clove
1/2 cup firmly packed brown sugar

Place all the ingredients into the slow cooker and mix well.  Cook on LOW for 8 hours.  Stir every so often.  When the time is up, you can mash with a potato masher for chunkier sauce or use an immersion blender for a smooth sauce.  Remember-the flavor of the spices will intensify in the slow cooker so if you don't love the punch of the spices, lower the amounts.
I kept sneaking apples out of the cooker-they tasted like yummy apple pie!
Finished product-darker than what I was used to, but super caramel yumminess!


I also tried a new chicken recipe last week.  I love barbecue anything.  From pulled pork to barbecue chicken, if it has barbecue sauce on it, I'll most likely LOVE it.  The recipe I tried was BBQ Chicken-a moist, yummy, flavorful chicken.  I used a few different slow cooker BBQ chicken recipes and took a bit from each one and this seemed to be my favorite.  I served the chicken with roasted potatoes and green beans.  I only add a few dashes of Tabasco because the kids won't eat it if it's too spicy.  I add some Tabasco to my own dish at dinner.  I totally forgot to take the pics of the process, but then again, do we really need to see pics of raw chicken?!?!

BBQ CHICKEN BREASTS

6 boneless, skinless chicken breasts
8 oz can tomato sauce
6 oz. water
2 TBS yellow mustard
3 TBS Worcestershire
1/4 cup apple cider vinegar
1/2 tsp Lawry's Seasoned Salt
dash pepper
dash garlic powder
4 TBS brown sugar
a few dashes of Tabasco
small onion, chopped

Trim excess fat from the chicken.  Sprinkle with Lawrys & rub into both sides of the breasts.  Spray the slow cooker with non stick spray and place chicken in cooker.  In a medium bowl, combine the rest of the ingredients.  Pour over the chicken and cover the slow cooker.  Cook on LOW for 6 1/2 hours.  For a thicker sauce, you can cut the water to 4 oz. or leave the cover off for the last hour of cooking.
 
 
This season brings out my inner comfort food cook, so I can't wait to keep cooking and eating this Fall.  Everyone seemed to really enjoy these and it's almost time to make more applesauce! Next blog will be about pumpkins!!!!  Painting, picking and maybe even some carving.  Until then, enjoy the cool breeze and pray the rain stops-the minis and I need to get out and play in some leaves!